3.4 Working with tables of records
The MyID Operator Client displays tables of records in the following places:
-
In search results forms.
For example, when you select the People search, or the Issued Devices by Category report.
Search results are displayed in pages. Scroll to retrieve the next page of results automatically. The number of displayed results is shown at the top of the form.
If more results are available, the text (scroll for more) appears; for example:
257 results - 50 displayed (scroll for more)
You can select a record from the search results to open the viewing form; for example, View Person or View Device.
-
In secondary search forms.
For example, when searching for a device to assign to a request.
-
In data tables.
For example, on the Devices tab of the View Person screen.
-
In batch results.
For example, after requesting devices for multiple people.
3.4.1 Working with columns
You can resize, move, or show and hide the columns in the display.
3.4.1.1 Resizing and moving columns
To resize a column, click the sizing bar between columns, and drag the column to the required size.

To move a column, click the column, and drag it to the required position.

3.4.1.2 Displaying and hiding columns
You can choose to display or hide each column on the display. This allows you to concentrate on the information that is important to you and to reduce on-screen clutter.
To display or hide multiple columns at the same time, use the column selector; click the Columns  button. You can also open this selector by clicking the three dot menu option on any column and selecting Manage columns. The three dot menu option is visible when you hover your mouse over the column title.
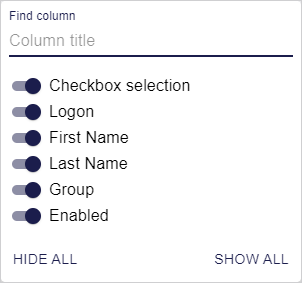
You can filter the list of columns by typing in the Find column field.
Select a column to display it, or deselect the column to hide it.
You can also click Hide All or Show All to hide or display all the columns.
To hide a single column, click the three dot menu option on the column you want to hide, then select Hide column from the pop-up menu.
3.4.2 Sorting
Note: Not all columns are sortable. If a column is sortable, the sorting arrow appears when you hover your mouse pointer over the header tile.

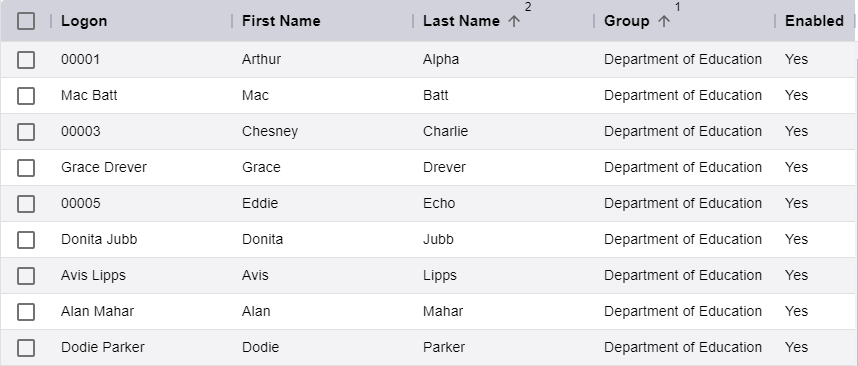
To sort a column, click the header tile. Click once to sort ascending, again to sort descending, and again to stop sorting. Alternatively, you can sort ascending or descending by clicking the three dot menu option and selecting Sort by ASC or Sort by DESC from the pop-up menu.
You can sort by multiple columns. For example, in the People report, sort by Last Name, then sort by Group, and MyID sorts the records by last name within their groups. The sort indicators include numbers to show you the precedence of the sort; the most recent sorted column takes precedence.
Note: Not all tables of records allow sorting on multiple columns. For example, if you are searching a directory, you can sort on only one column; this is for performance reasons.
If you download the results of a report to a file, the sort order is applied to the data in the downloaded file. See section 7.2, Running reports for details of downloading reports.
The sort criteria are included in the browser location bar
3.4.3 Grouping
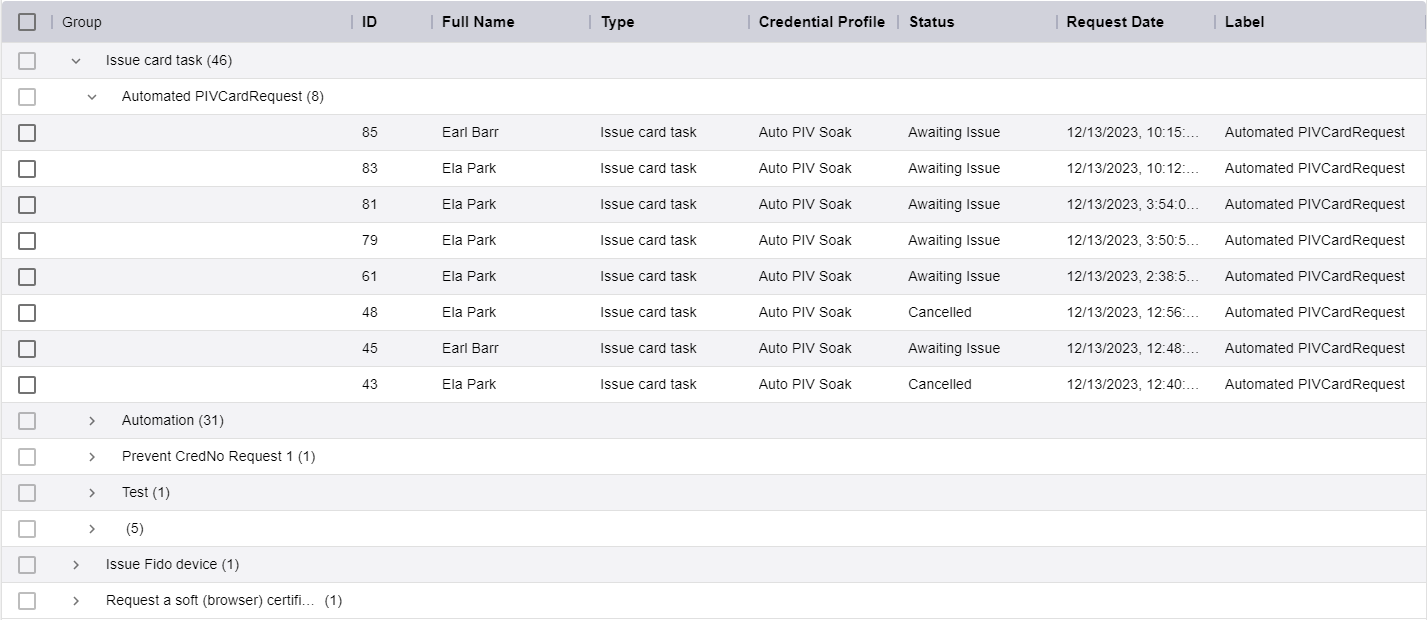
You can group your records; this allows you to collapse a group and concentrate on one section at a time.
To group your records, click the three dot menu option on the column you want to group, then from the pop-up menu select Group by <column name>.
MyID collapses the search results into their groups. The number of records in the group is displayed in brackets. Click the > symbol to expand the group.
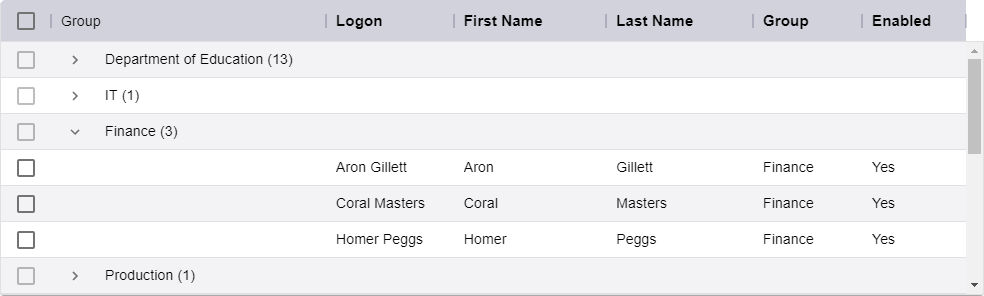
You can group by multiple columns. The first grouping that is set takes precedence.
You can have both sorting and grouping on the same table; first set up your sorting, then select your groupings. If you want to have your groupings sorted, set the sorting for those columns before selecting the groupings.
To stop grouping, click the three dot menu option on the column by which you are grouping, then from the pop-up menu select Stop grouping by <column name>.
3.4.4 Filtering
You can filter the displayed records.
To filter on a column, click the three dot menu option on the column you want to filter, then from the pop-up menu select Filter.
Alternatively, click the Filters  button.

Enter the criteria for the filter:
-
Columns – select the column on which you want to filter.
-
Operator – select the operator.
The operations available depend on the type of field; for example, dates have operators such as is after or is on or before, numeric values have operator such as = or >=, and text fields have operators such as contains or starts with.
-
Value – type the value you want to filter on. For dates, you can use the date picker.
If you want to add another filter, click Add Filter.

Select the conjunction for the filters:
-
And – both filters must be satisfied.
-
Or – either filter can be satisfied.
When one or more filter is active, the Filters button displays a number indicating the number of active filters.

Click the Filters button to display the active filters. From this dialog, you can amend the filters; click the Delete  button to remove a filter, or click Remove All to remove all filters.
3.4.5 Changing the row spacing
You can change the spacing of the rows. Click the Density  button.

From the pop-up menu, select one of the following to change the spacing of the rows:
-
Compact – narrowest spacing.
-
Standard – medium spacing.
-
Comfortable – wide spacing.
3.4.6 Working on multiple records
If you want to work on multiple records (for example, to edit multiple people, or cancel multiple requests) you can use the select option in the results screen, then work through the records one by one. Search for the records you want to work with, and the results appear.

In the above example, you have searched for everyone in your organization; however, you only need to edit three of the people listed, not all of them.
Use the checkboxes at the left of each record to mark the records you are interested in.
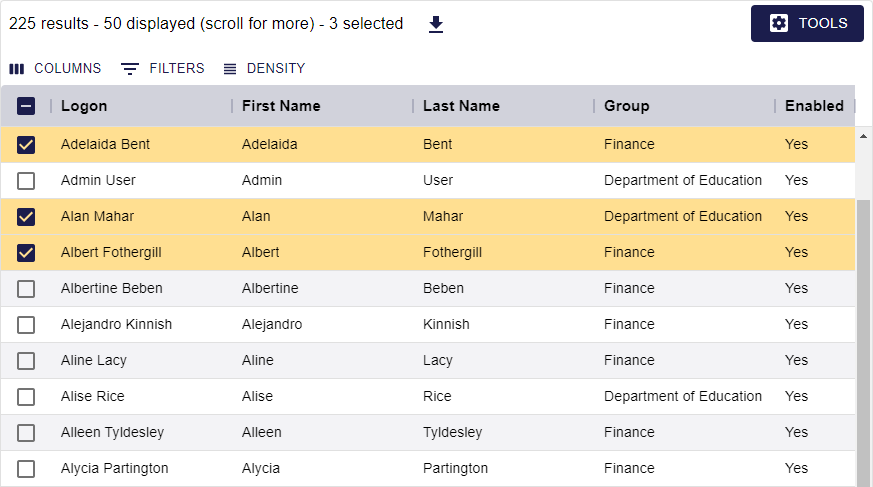
Note: You can mark or deselect all records using the checkbox in the header.
Once you have marked the records you want to work with, click on any marked record to open the set.
Note: If you click a record that is not marked, that record opens, and is not included in the set; however, if you return to the results list, you will not have lost your marked records.
The navigation toolbar at the top right of the record shows your position in the results set and allows you to move between records:

To navigate the records:
-
To view the previous record, click the Previous button:

-
To view the next record, click the Next button:

-
To return to the search list, click the Return to results button:


3.4.7 Performance considerations for searching large sets of data
You may experience performance issues when searching large sets of data. In addition, when you sort on a column, MyID retrieves the records from the server, so the performance issue may occur several times when working with the records rather than once when initially retrieving the information from the database.
In some circumstances, you may see errors similar to the following:
WS60000 – Database timeout. Please contact your administrator for more information.
WS60001 – The search query timed out. Please contact your administrator for more information.
You are recommended to restrict your search query to identify the narrowest range of results.
Where it is not possible to narrow the range of results, to mitigate the performance issue, you can switch off the retrieval of the count of the number of records; this has been shown to improve the performance when working with large sets of data.
To disable the count of records on reports:
-
From the Configuration category, select Operation Settings.
-
On the General tab, set the following:
-
Disable Report Count – set to Yes.
By default, this option is set to No, which means that MyID retrieves a count of the number of records whenever performing a search.
-
-
Click Save changes.